The Chart of Accounts is the blueprint of the accounts in your organization. Chart of Accounts is a tree view of the names of the Accounts (Ledgers and Groups) that a Company requires to manage its books of accounts. ERPNext sets up a simple chart of accounts for each Company you create, but you can modify it according to your needs and legal requirements.
To access the Chart of Accounts, go to:
Login to ERP > Desktop > Accounting > Chart of Accounts
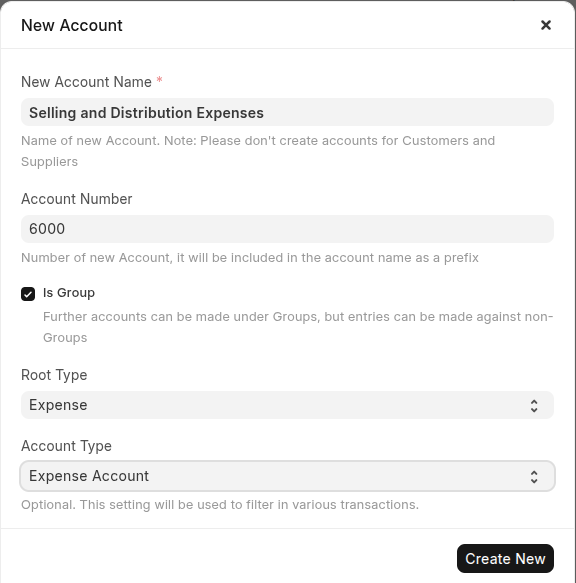
Create New Account
You can Create Root Account using below steps:
- Go to chart of account
- Click new it located at the top of the right corner.

- Se Root Account name and account Number.
- Enable "is Group" to group your root account.
- Select Root type.
- Click Create New
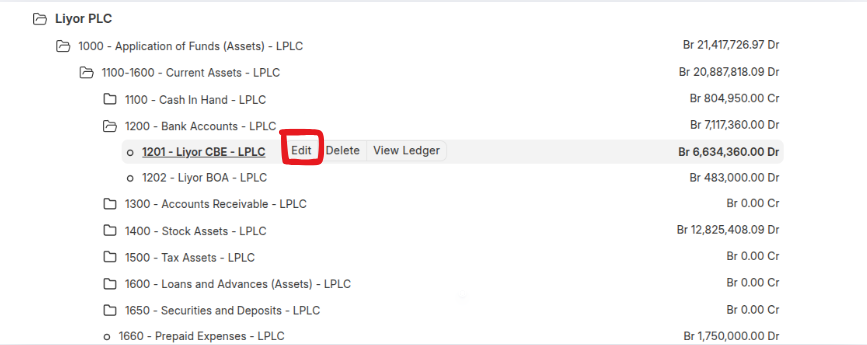
Edit Account Name and Number
When you want to edit your chart of account name and number simply use below steps:
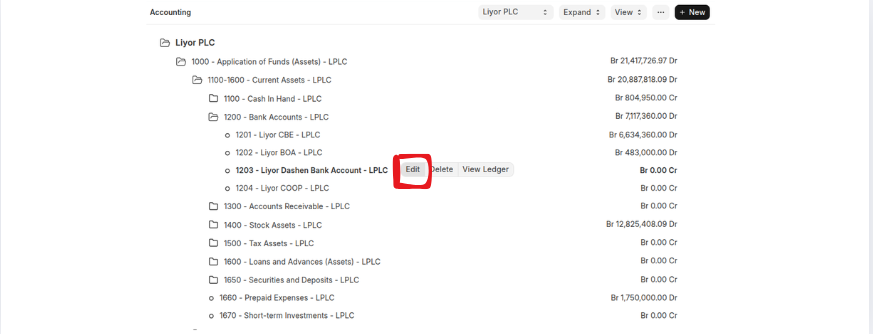
- Go to the Chart of Accounts, then click the account you want to edit.
- Click Edit
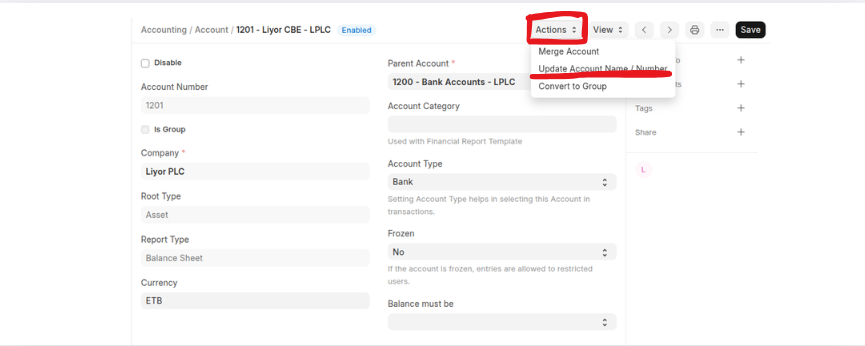
 Once you click Edit, the account details will be displayed.
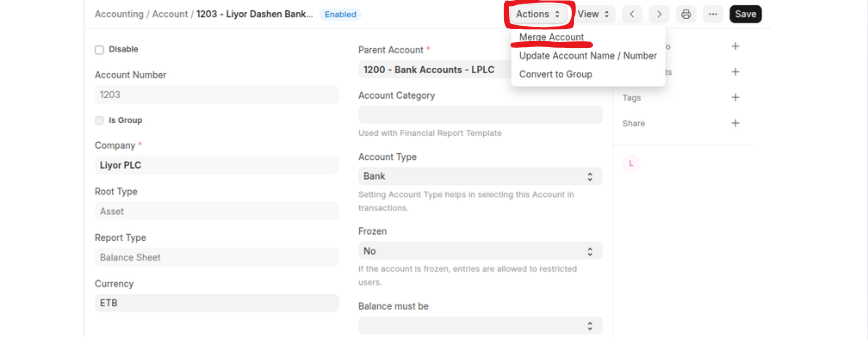
 - To change account name or account number go to Actions button.
- Press update account name/number.
- Enter your new account name or number
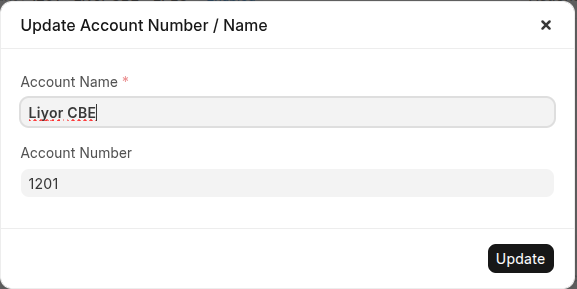
- Click update button.
Edit Account Details
When you want to edit your chart of account details such as account category, account type, currency and soon use below steps:
- Go to the Chart of Accounts, then click the account you want to edit.
- Click Edit
- Update the new changes such as account category, account type, currency, frozen and soon.
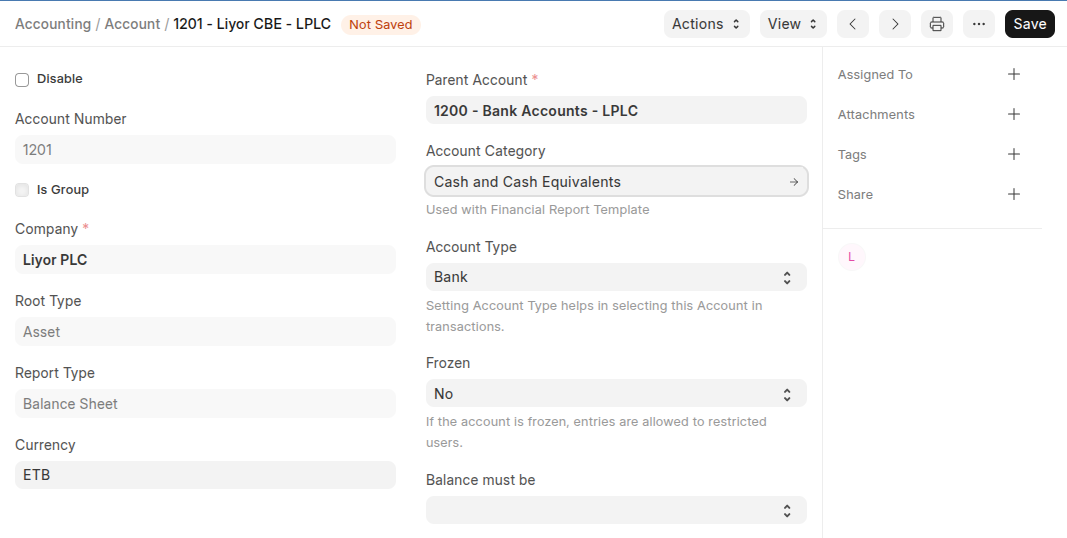
- Click Save
Delete Account
When you want to delete an account, simply go to the Chart of Accounts, then click the account you want to delete and click Delete. Once you click Delete, the account will be deleted.
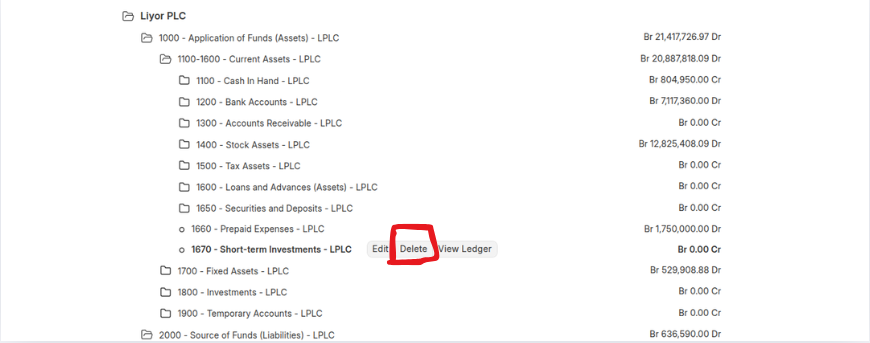 Note: To delete an account, it must have a zero balance.
Add Child Account
- Go to Chart of accounts: click group accounts which you want to add child accounts.
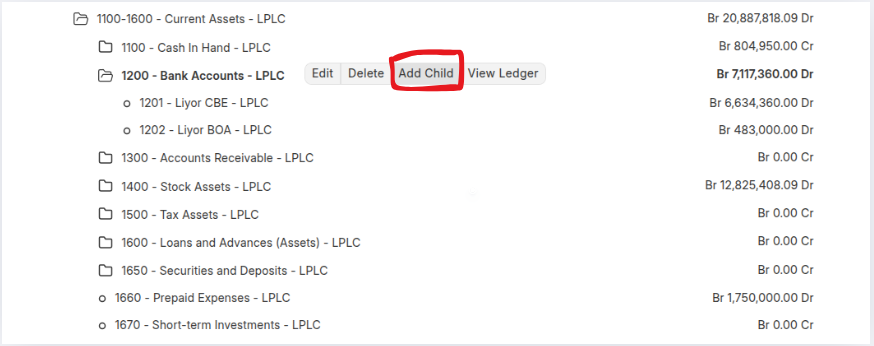
- Click Add Child
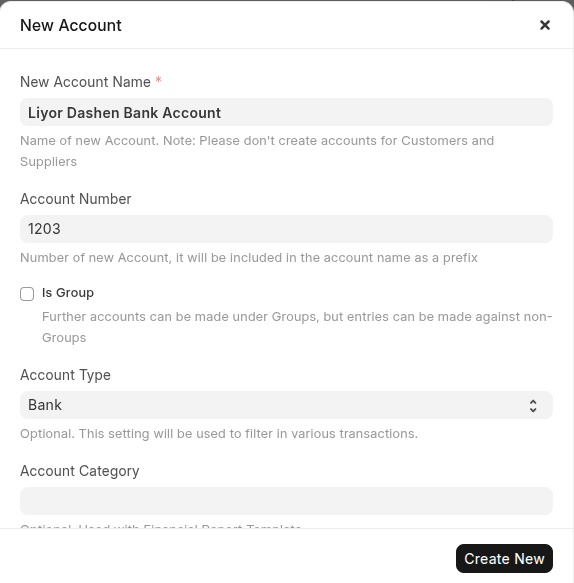
- Then enter Account Name and Acocunt number
- Click "is group" if the account have child accounts
- Select account type and Account category(optional)
- Select the currency if this account will be used for transactions with different currency
- Click create New.
Merge Accounts
If you want to merge your account you can merge acocunts using following steps:
- Go to Chart of accounts then click an account that you want to merge
- Go to Actions button then click Merge Account
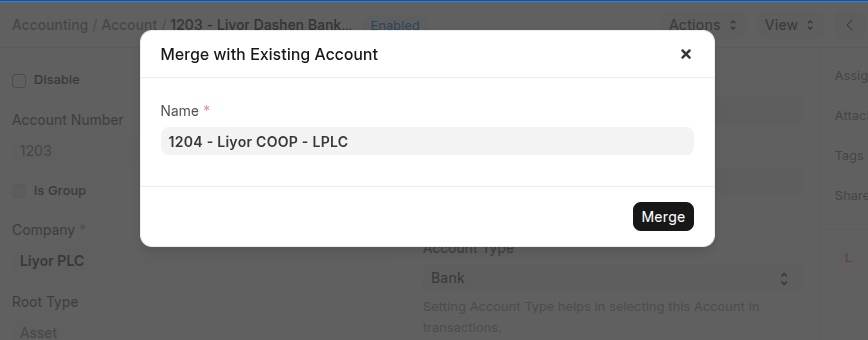
- Enter the accounts that you want merge with selected account
- Click Merge
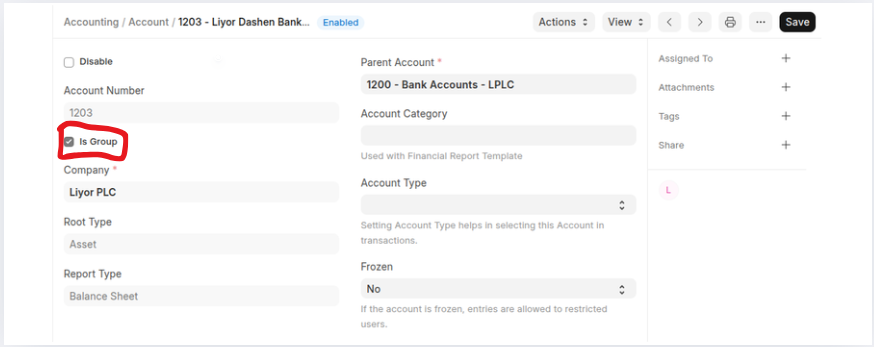
Convert to Group Account
To convert an accounts to group account simply use below steps:
- Go to Chart of accounts then click an account that you want to group account
- Go to Actions button then click Convert to Group
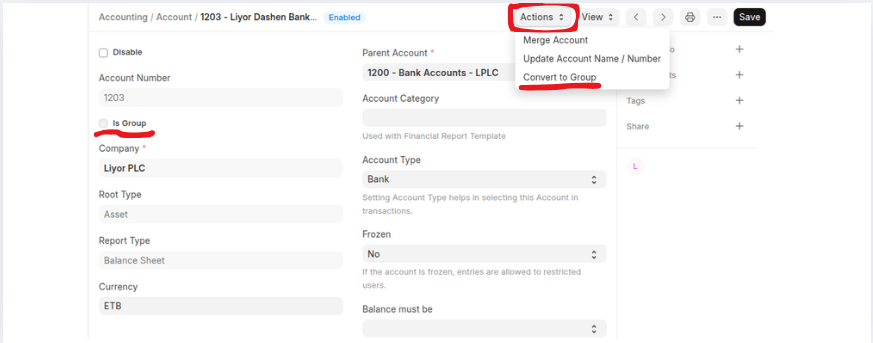
- Once you click Convert to group an account will be changed to group account
 Note: To convert the ledger account to group account the account type must be blank and balance should be zero.
Convert to Non-Group Account
To convert an accounts to group account simple use below steps:
- Go to Chart of accounts then click group account that you want to ledger account
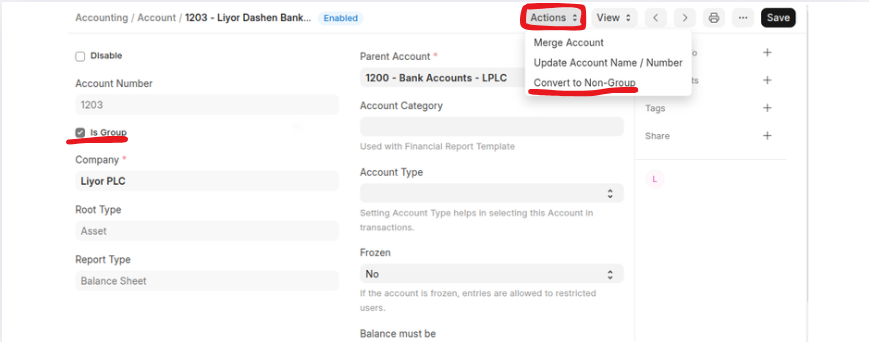
- Go to Actions button then click Convert to Non Group
- Once you click Convert to non group an account will be changed to ledger account
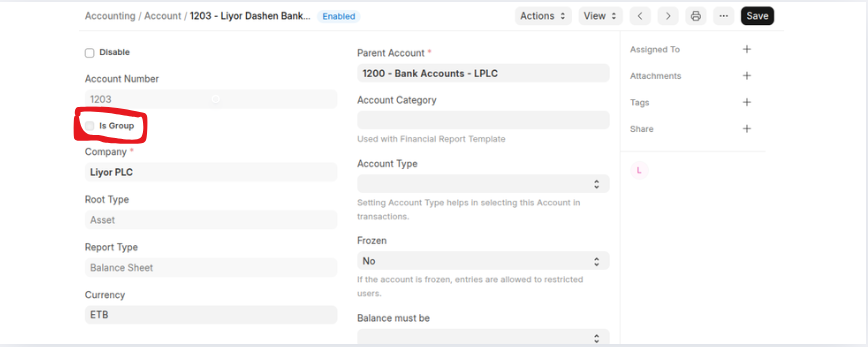
Note: A group Account that have child account can not be ledger account.